تفاصيل المنتج


Active holder for fixed installation
6 شاهد الناس هذا العنصر خلال الأسبوع الماضي
الكمية:
Charging holder with hard-wired power supply for a discreet, neat installation without cables hanging over the interior! Keeps your battery fully charged at all times and your device in an upright position for better reception. Provides for safer driving when viewing, accessing and operating your device in your vehicle. Custom made design with a perfect, firm fit for bare devices (not in case/skin/boot). Easy dock/undock your device with one hand.
Charging via pogo pins for reliable and durable charging that is gentle on the device's charging connector and can withstand frequent daily use. 12/24 Volt. The product is E-approved. Connect the power cable with a 2 A fuse. 2,7A charger. Professional installation recommended. The Molex charging box may be used for power supply of an additional device (cannot be used for data communication or audio connection).
The holder is equipped with a tilt swivel so you can easily adjust the angle for better viewing, or switch between portrait and landscape mode. Tilts 17° and swivels 360°. Mounting plate 42x50 mm with 4 mm AMPS-holes. Made of high grade black ABS/Acetal plastic. Made in Sweden. For easy and optimal installation, attach the holder onto a custom ProClip Vehicle Mount, a Pedestal Mount or attach it directly to any surface.
Easy-switching system:
The easy-switching system enables you to upgrade the holder only, and keep the installed cables. It saves you a lot of time! When upgrading to a new device, you do not longer need to make a full installation. Same goes for maintenance in case of warranty or damage. You simply disconnect the holder from the charging cable via the Molex 6-pin quick connector, and then connect the new holder. The switch is done in a few seconds.
دليل تركيب المنتج
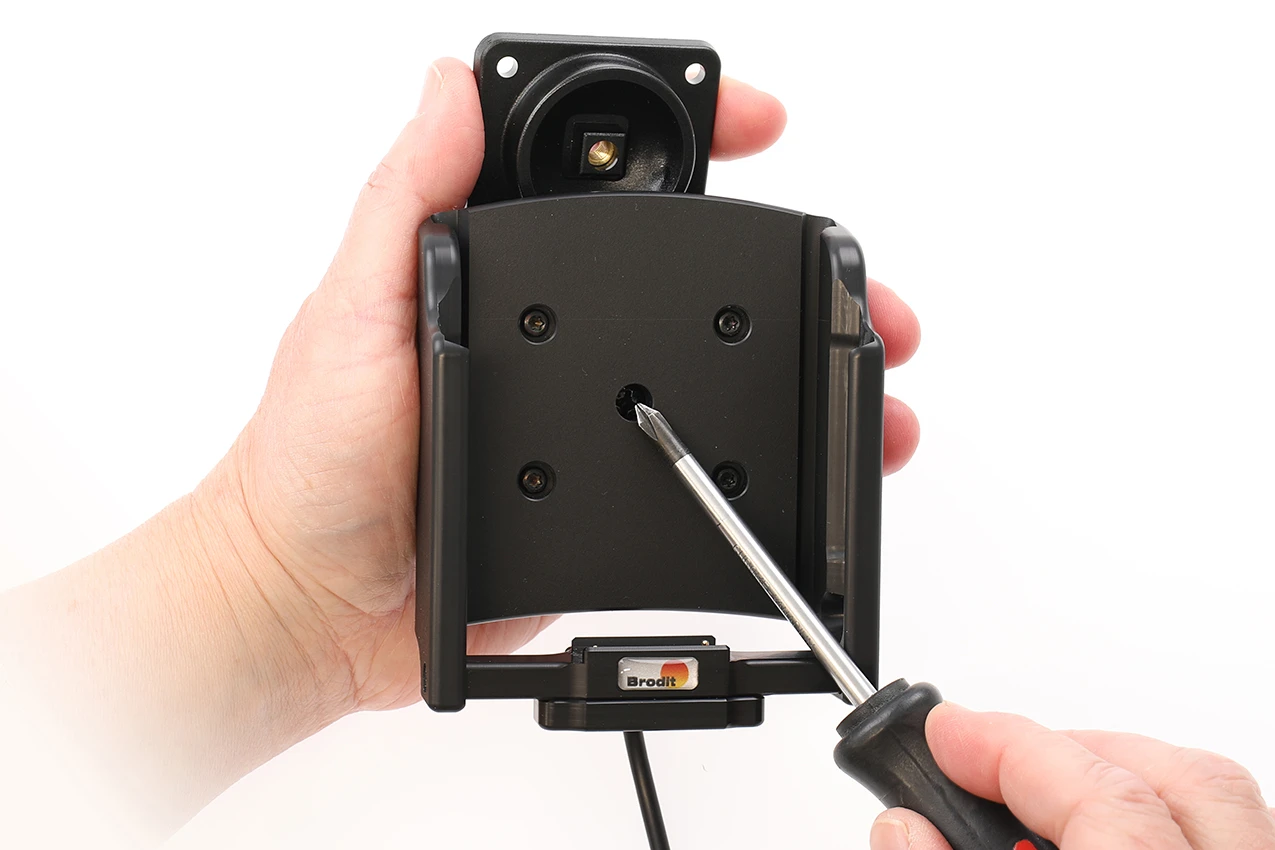
رقم الخطوة 1
Loosen the screw in the center of the holder so you can remove the tilt swivel attaching plate on the back.
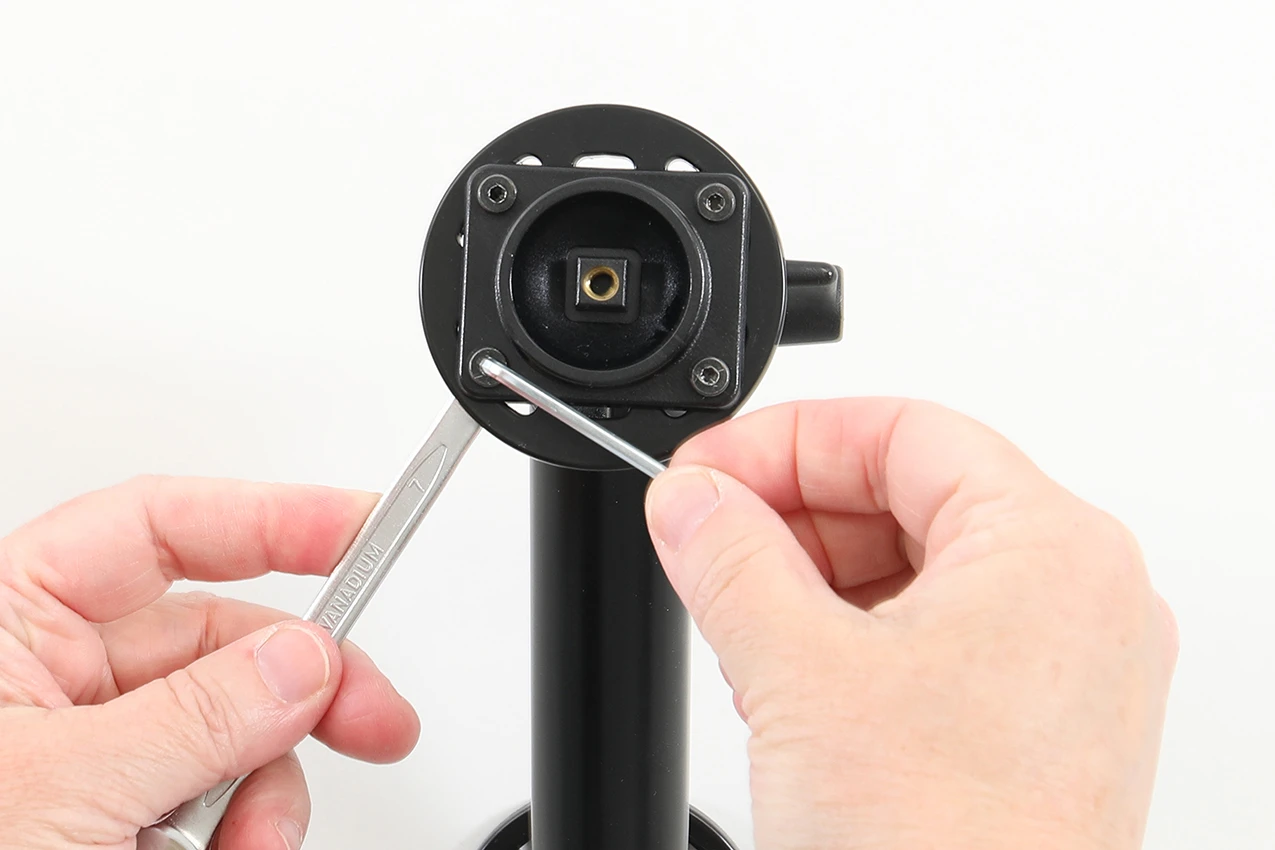
رقم الخطوة 2
Place the attaching plate onto the desired position. Screw the attaching plate into place with the enclosed screws.
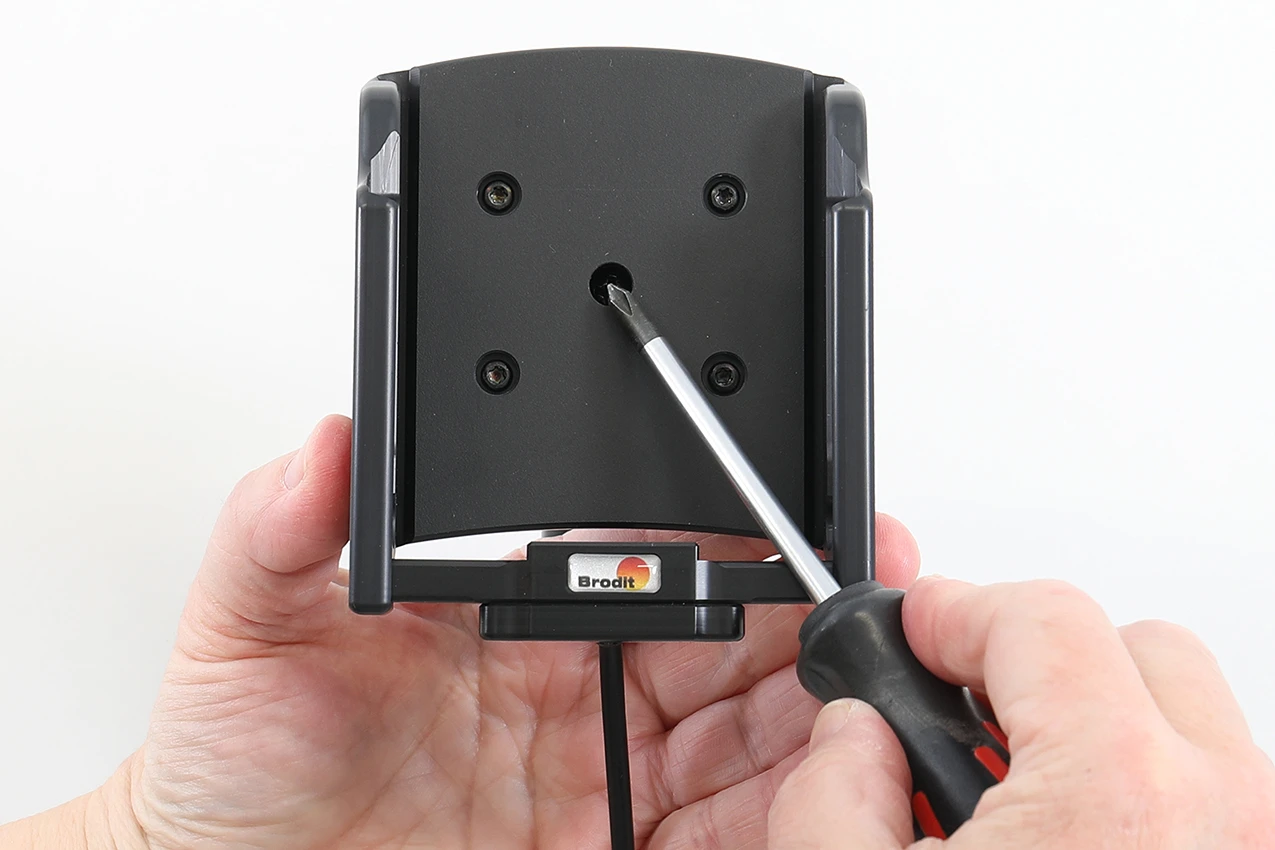
رقم الخطوة 3
Place the holder over the attaching plate so the screw fits in the hole in the tilt swivel and screw it into place. Tighten the screw firm at first, then loosen it a bit so the holder is firmly in place, but still can be adjusted.
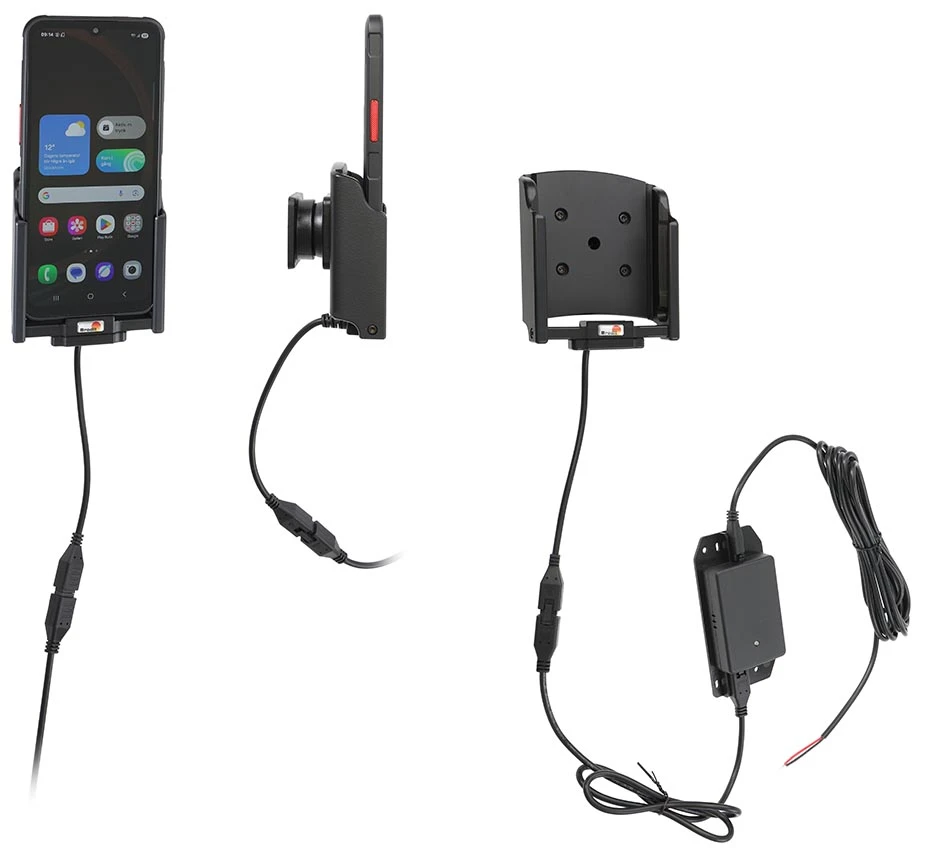
رقم الخطوة 4
The holder is in place.

John Doe
Exceptional sound quality and comfort
Lorem ipsum dolor sit amet, consectetur adipiscing elit. Vestibulum at lacus congue, suscipit elit nec, tincidunt orci. Phasellus egestas nisi vitae lectus imperdiet venenatis. Suspendisse vulputate quam diam, et consectetur augue condimentum in.

Jane Smith
Great headphones, battery could be better
Lorem ipsum dolor sit amet, consectetur adipiscing elit. Vestibulum at lacus congue, suscipit elit nec, tincidunt orci. Phasellus egestas nisi vitae lectus imperdiet venenatis.
Michael Johnson
Impressive noise cancellation
Lorem ipsum dolor sit amet, consectetur adipiscing elit. Vestibulum at lacus congue, suscipit elit nec, tincidunt orci. Phasellus egestas nisi vitae lectus imperdiet venenatis. Suspendisse vulputate quam diam.